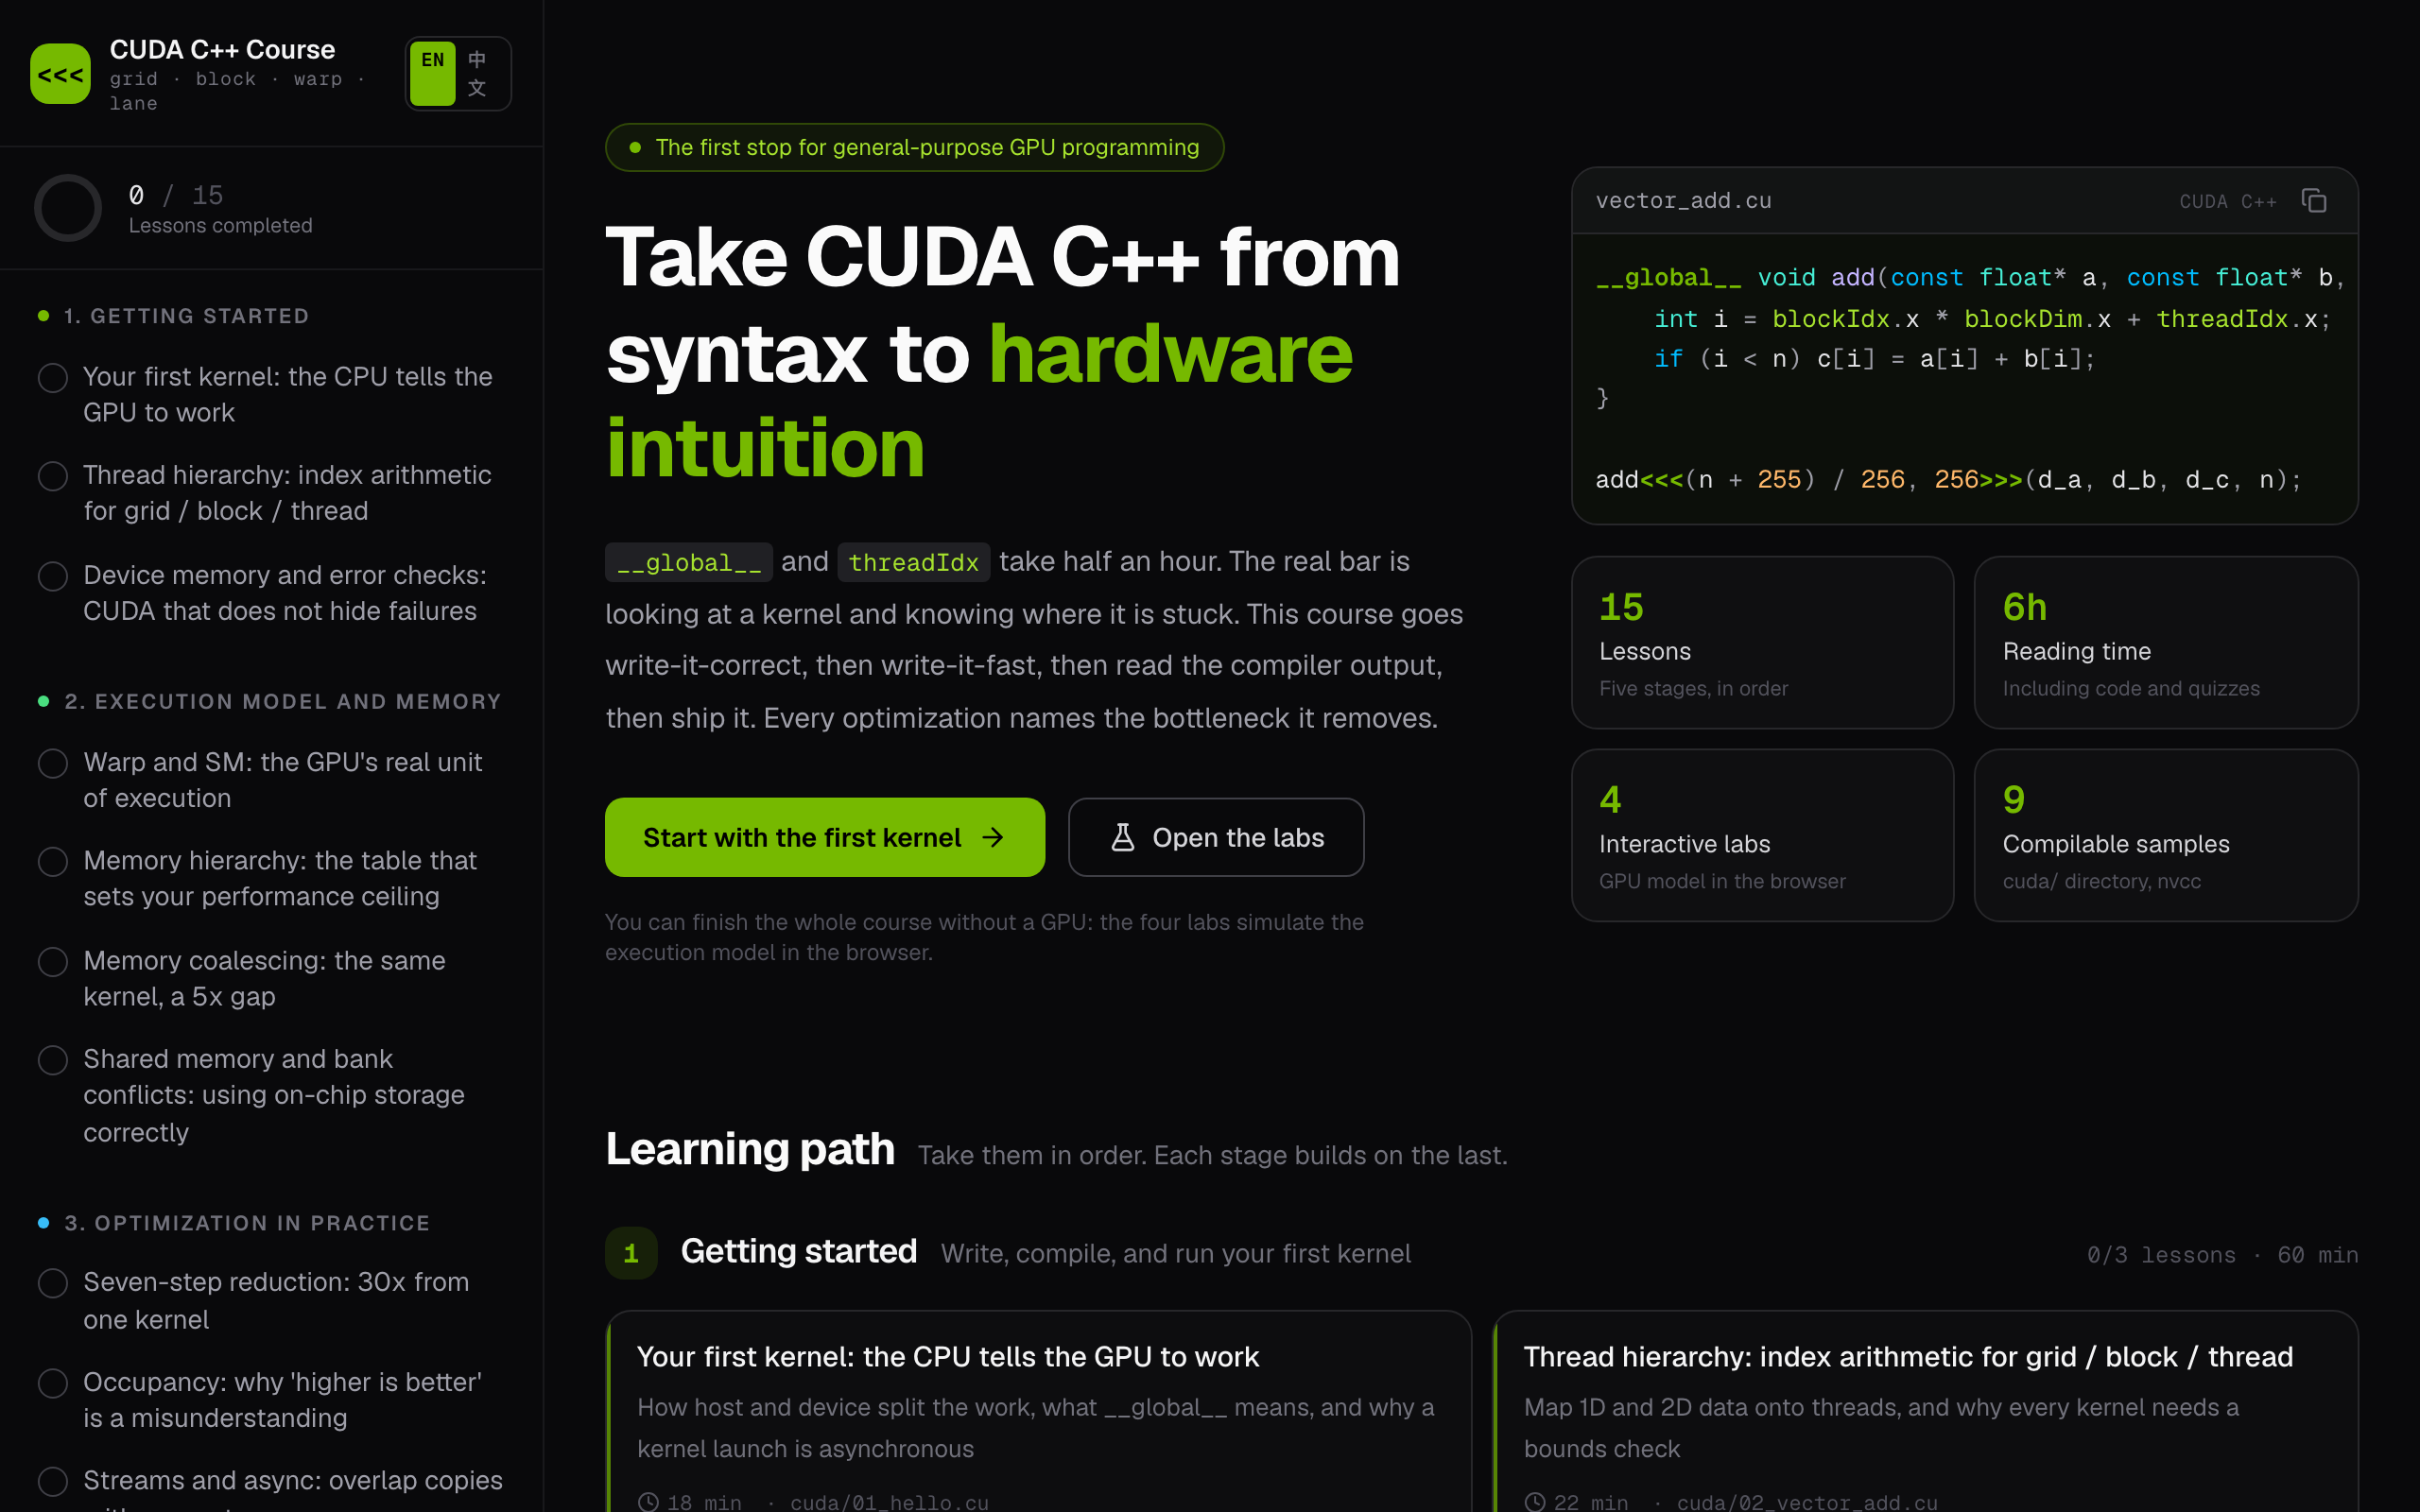
This course is for C++ programmers who want to write CUDA kernels and understand why they are slow, including people who have no NVIDIA card. __global__, threadIdx and the <<<>>> launch take half an hour to learn. The real bar comes after: looking at a kernel and knowing where it is stuck. So every optimization in the course names the bottleneck it removes, instead of listing best practices.
The site has two halves that meet in the middle. Fifteen lessons and four labs run in the browser and need no GPU. Nine compilable samples in the repository’s cuda/ directory run on a real card when you have one, each matching a lesson.
- What it is
- an interactive CUDA C++ course on the web, in English with Chinese at
/zh/ - Lessons
- 15 in five stages, about six hours of reading including code and self-checks
- Labs
- four browser simulations of the GPU execution model
- Samples
- nine CUDA programs with timing and result checks, plus a CPU check that needs no GPU
- Progress
- kept in your browser, with no account
- Built with
- Next.js 16 as a static export, TypeScript, Tailwind CSS v4, on GitHub Pages
What lesson one asks of you
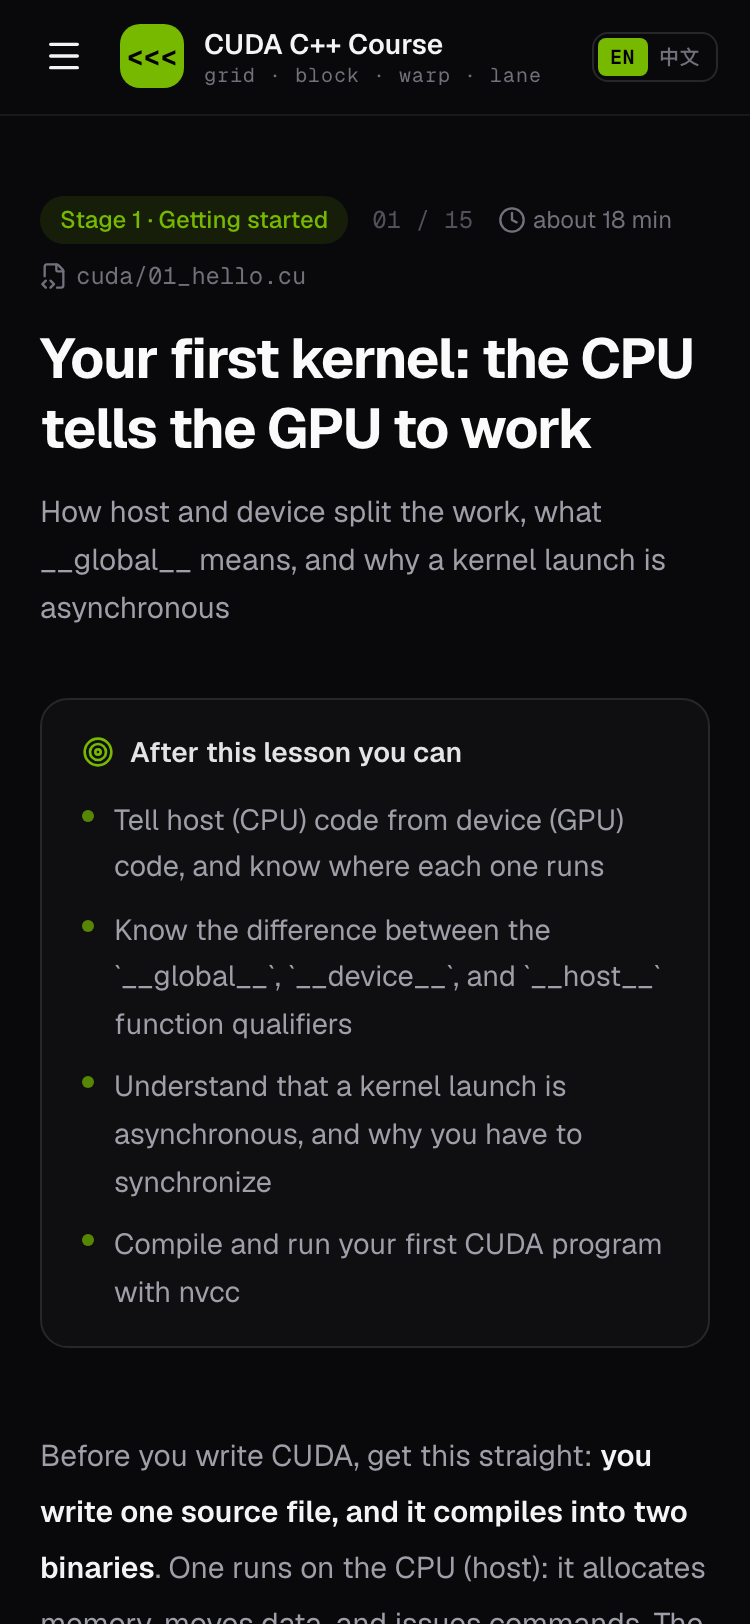
Lesson one, “Your first kernel: the CPU tells the GPU to work”, is an 18-minute read tied to cuda/01_hello.cu. It opens with four goals and then makes one point before any code: you write one source file, and it compiles into two binaries. One runs on the CPU and moves data and issues commands; the other runs on the GPU and does the parallel work. A diagram follows one kernel call through its whole life, from cudaMalloc to cudaFree.
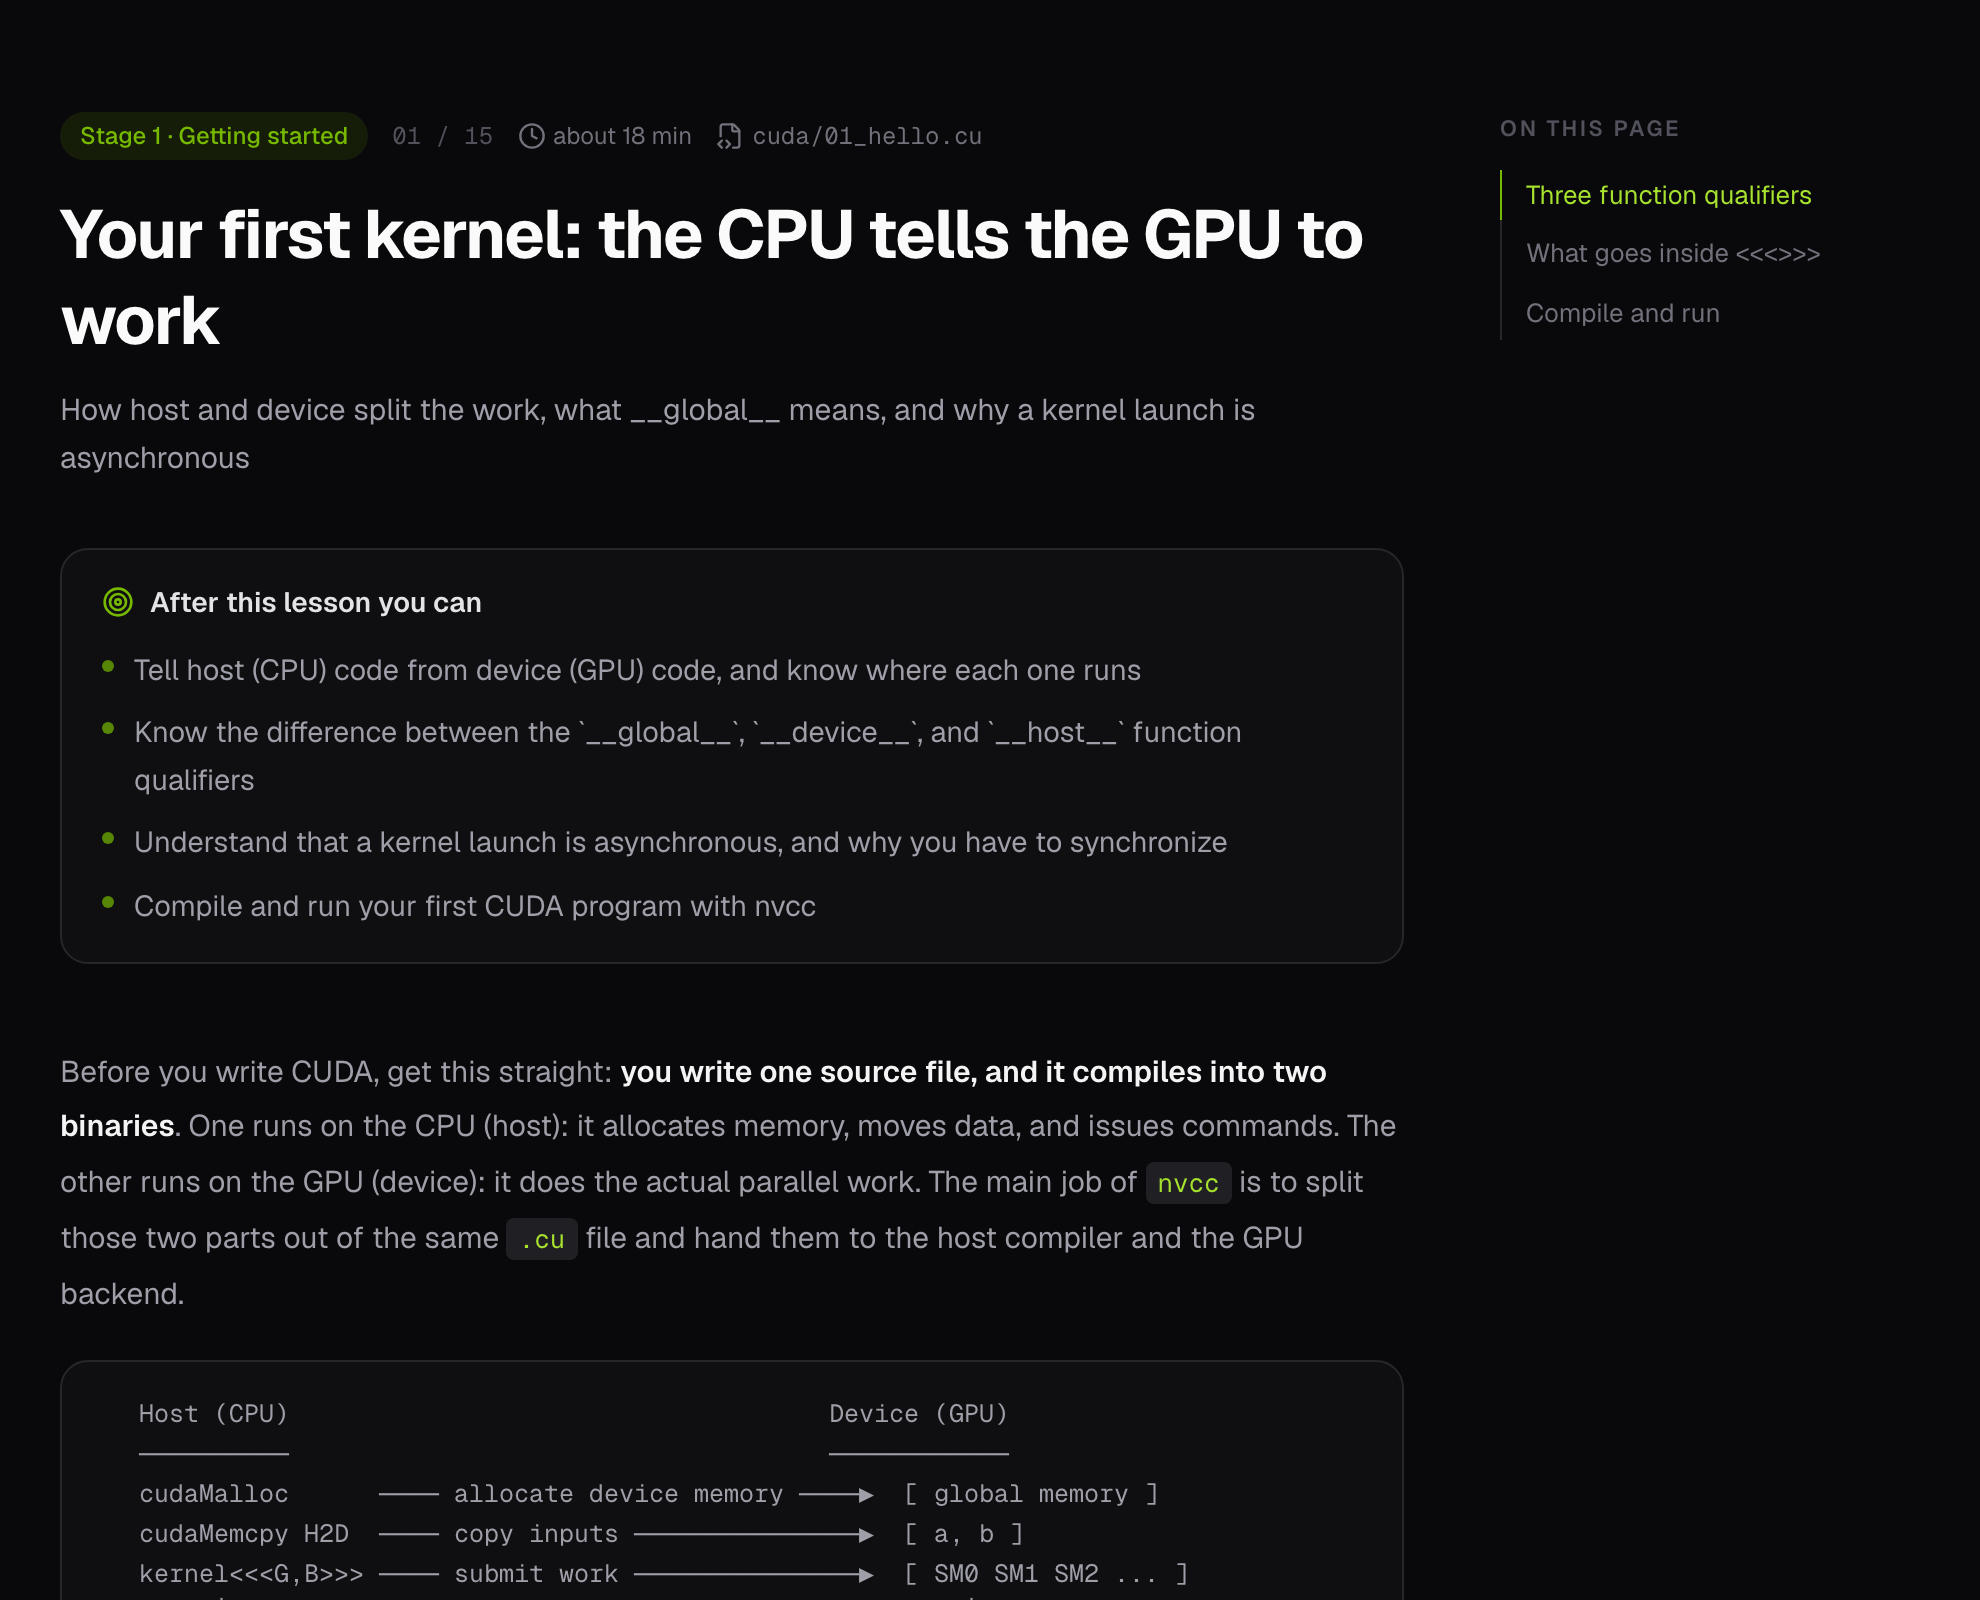
Then the lesson walks through the work a beginner actually does:
- Sort the functions. A table separates
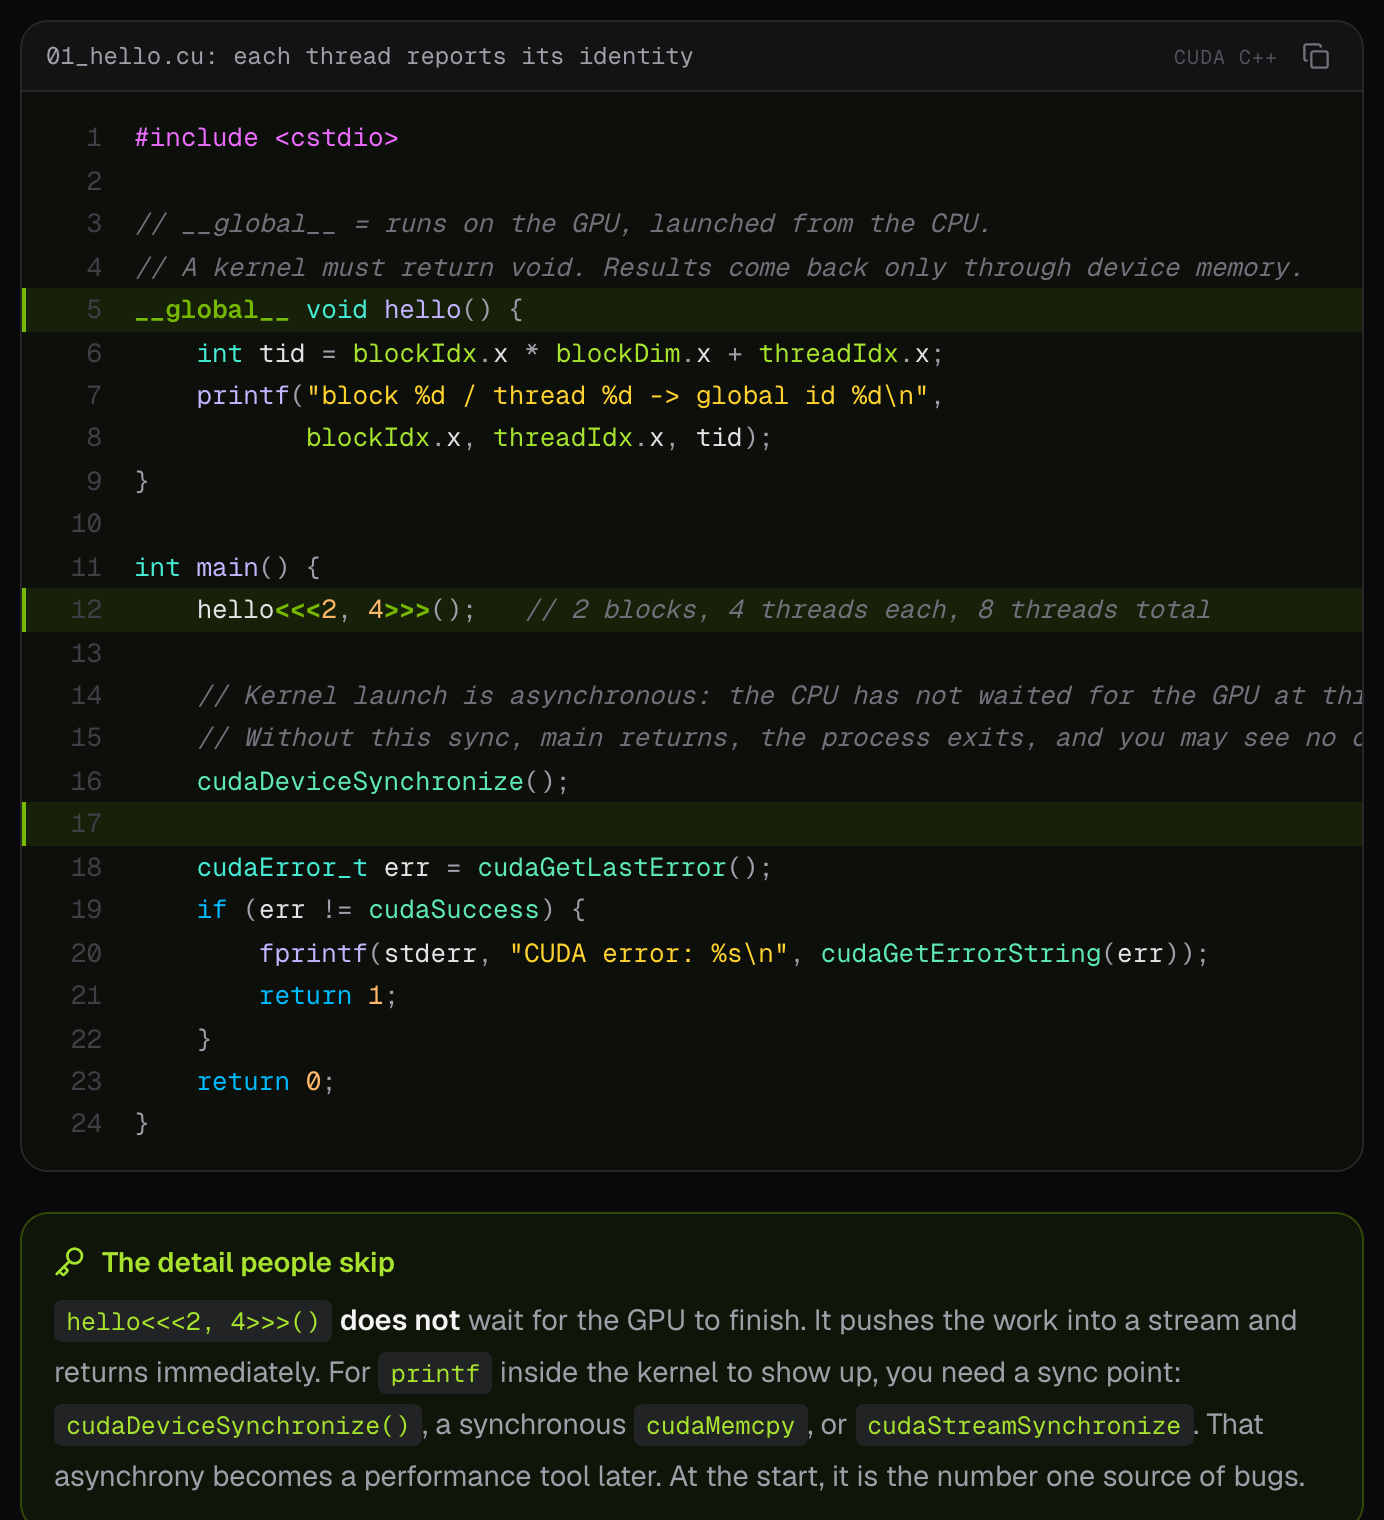
__global__,__device__,__host__and__host__ __device__: where each runs, who may call it, and what it is for. - Read the first kernel. Each of eight threads prints its block, its thread index and its global id, computed as
blockIdx.x * blockDim.x + threadIdx.x. - Learn the trap.
hello<<<2, 4>>>()returns at once. WithoutcudaDeviceSynchronize(),maincan return before the GPU flushes itsprintf, and you see nothing. - Hit the limit. A block has at most 1,024 threads. Ask for more and the kernel silently does not run, unless you check
cudaGetLastError(). - Compile, or don’t.
nvcc -O3 -arch=sm_80with a table of architectures, and for readers without a card, Google Colab’s free T4. - Check yourself. Three questions, then “Mark as done”.
Code highlighted for CUDA
Stock highlighters treat CUDA as plain C++, which hides exactly the tokens a beginner needs to see. The course has its own highlighter that knows the qualifiers (__global__, __shared__, __launch_bounds__ and the rest) and the builtins (threadIdx, blockIdx, blockDim, gridDim, warpSize), and it also covers PTX, Python, Bash and Makefiles for the later lessons. Every block has a copy button, and a lesson can mark the lines its text talks about.
Self-checks and progress
A lesson ends the same way every time, with a check you run on yourself.
Answer first, then open
Every lesson ends with three questions, 45 in all. The instruction is to answer in your head first and open the answer only after. Answers fold open one at a time, and if you cannot answer, the lesson says to reread the section.
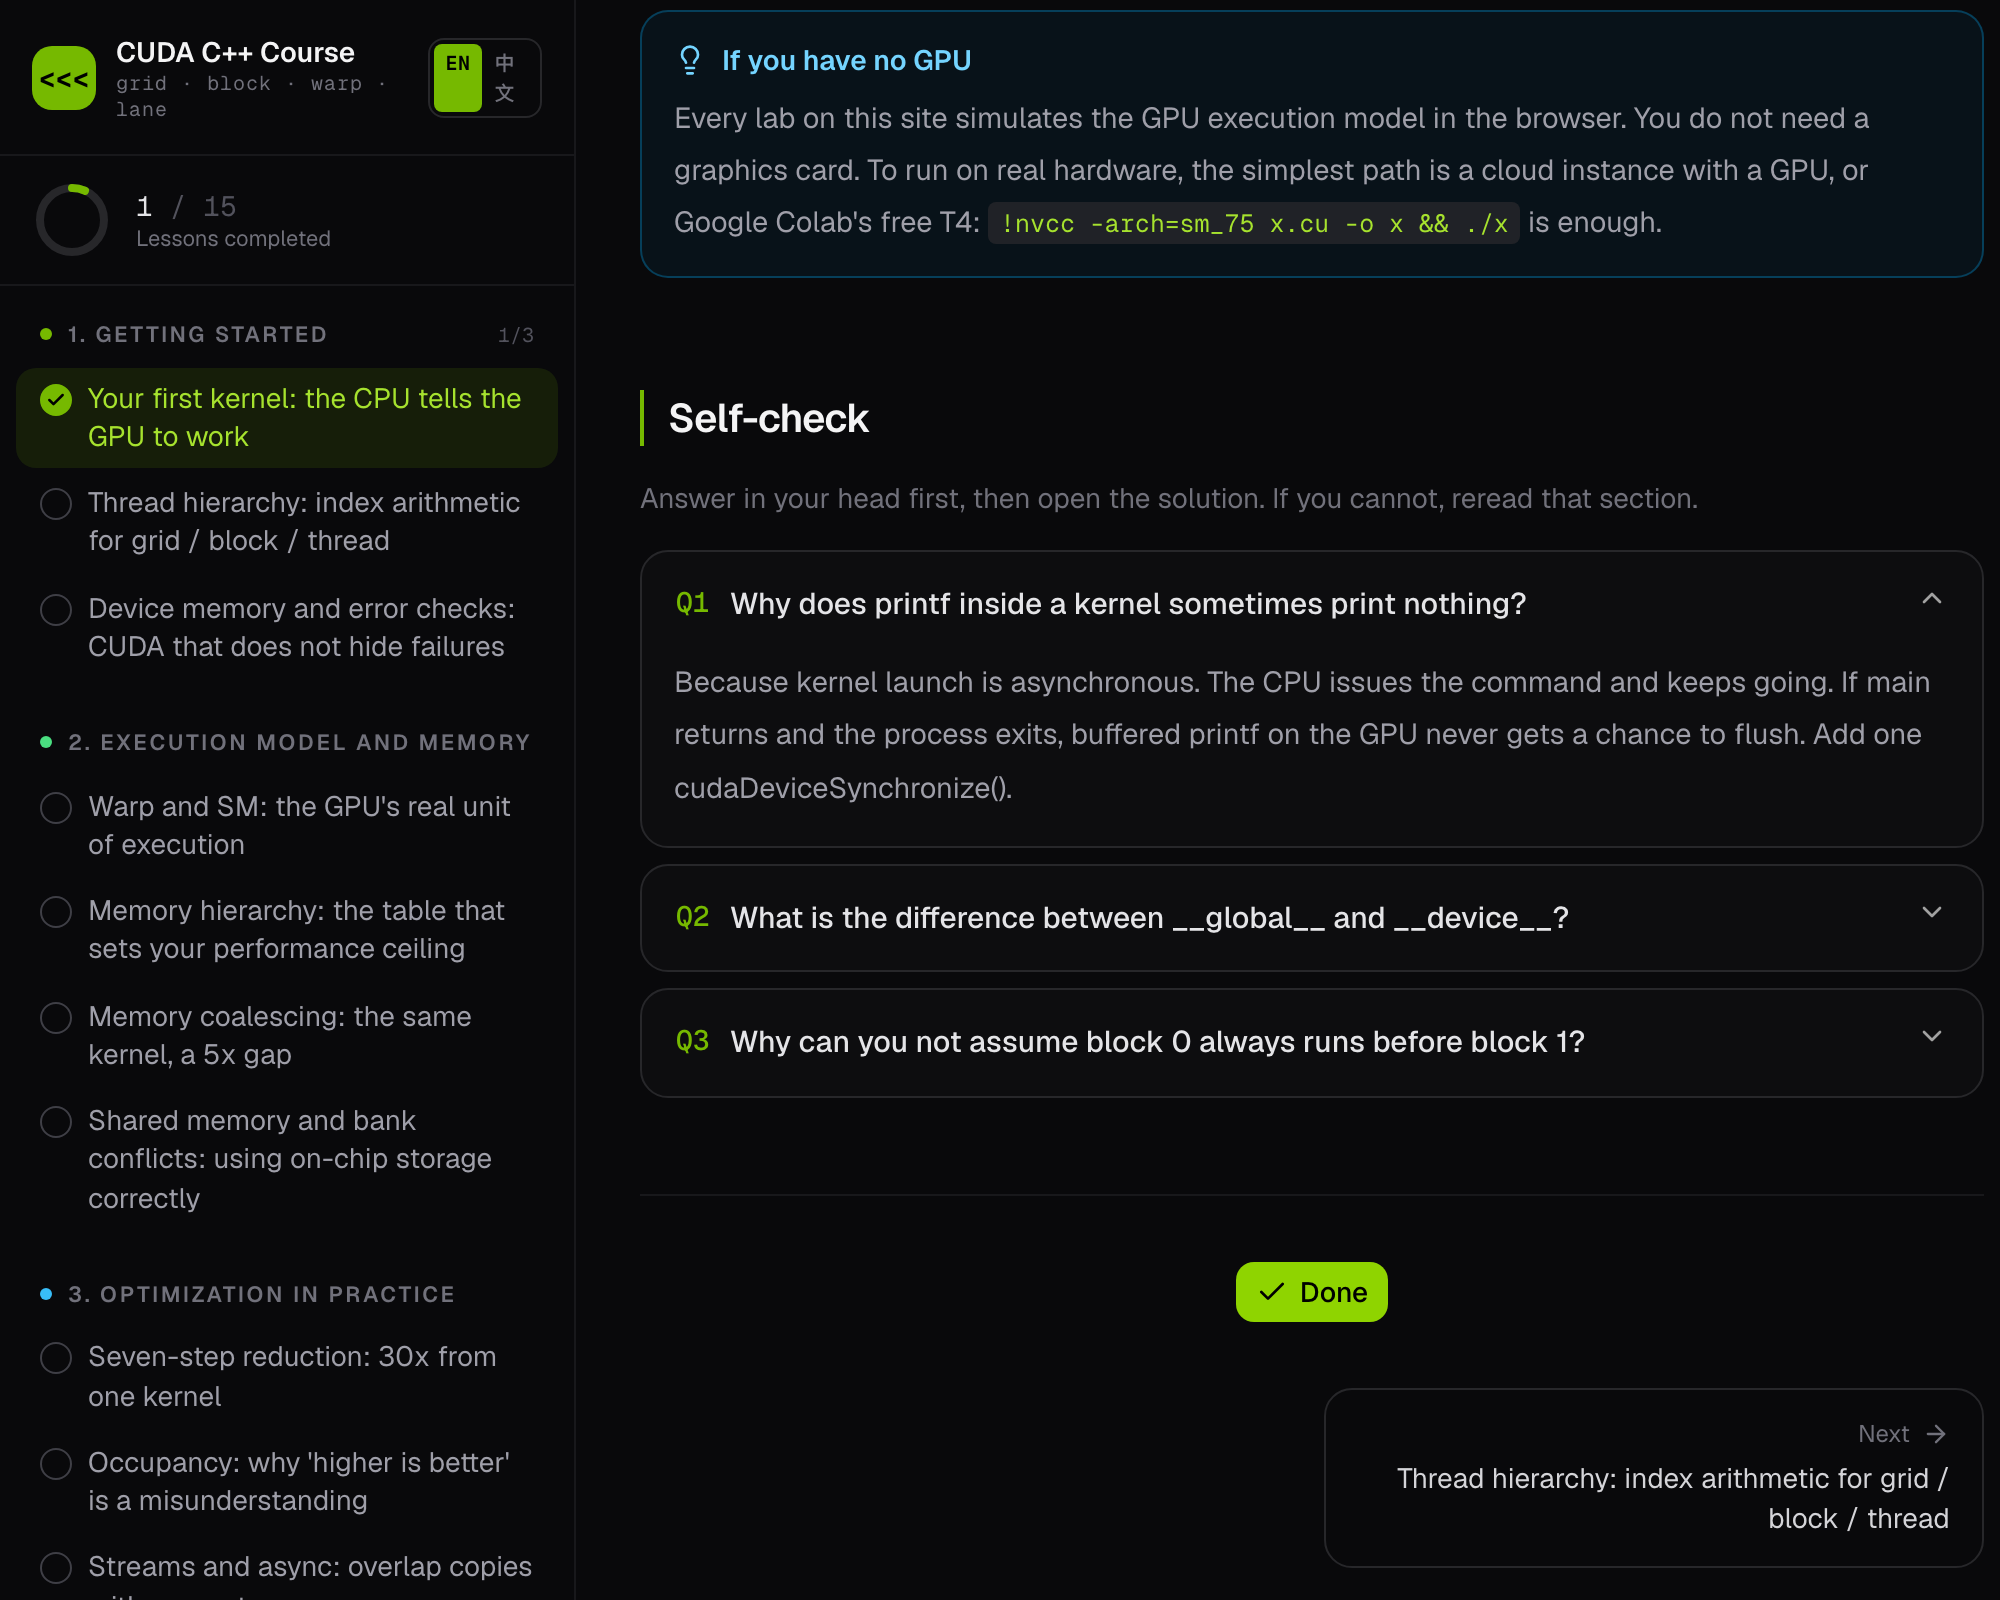
“Mark as done” ticks the lesson in the syllabus and moves the progress ring. Progress lives in your browser’s localStorage, so there is no account to make.
Later lessons
The fifteen lessons are grouped in five stages, and each stage builds on the one before:
| Stage | What it covers |
|---|---|
| 1 · Getting started | First kernel, thread hierarchy and index math, memory management and error checking |
| 2 · Execution model and memory | Warps and SMs, the memory hierarchy and arithmetic intensity, coalescing, shared memory and bank conflicts |
| 3 · Optimization in practice | A seven-step reduction, occupancy trade-offs, streams and CUDA Graph |
| 4 · Going lower | Warp primitives and aggregated atomics, reading PTX and SASS |
| 5 · Production and AI | Profiling method, PyTorch custom operators, Tensor Cores and Triton |
The titles say what each lesson argues. “Memory coalescing: the same kernel, a 5x gap.” “Seven-step reduction: 30x from one kernel”, which takes the classic sum from a naive version to warp shuffle and gives the reason for each speedup. “Occupancy: why ‘higher is better’ is a misunderstanding.” By the end you are reading SASS for register spills, reading a roofline in Nsight Compute, and wrapping a kernel as a PyTorch operator with autograd.
One choice runs through the later lessons. Many reduction tutorials written before 2017 rely on “implicit warp synchronous” code, which is intermittently wrong on Volta and later GPUs. The course never does; the last warp of its reductions uses masked shuffles, as in cuda/06_reduction.cu:
if (tid < 32) {
    float sum = sdata[tid];
    if (blockDim.x >= 64) sum += sdata[tid + 32];
    for (int off = 16; off > 0; off >>= 1)
        sum += __shfl_down_sync(0xffffffff, sum, off);
    if (tid == 0) out[blockIdx.x] = sum;
}
Four labs, no GPU
The labs turn the abstractions into something you can drag. They simulate the execution model in the browser and need no GPU. Each one keeps one mechanism and cuts the rest; the essay on the course goes through what each cuts and why.
Thread index visualizer
Set blockDim, gridDim and the element count with sliders, then click any thread. The lab shows the index arithmetic for that thread, the warp and lane it belongs to, and whether the bounds check rejects it. With 64 threads per block, 4 blocks and 200 elements, 256 threads launch and 56 do nothing. A 2D mode does the same for a matrix.
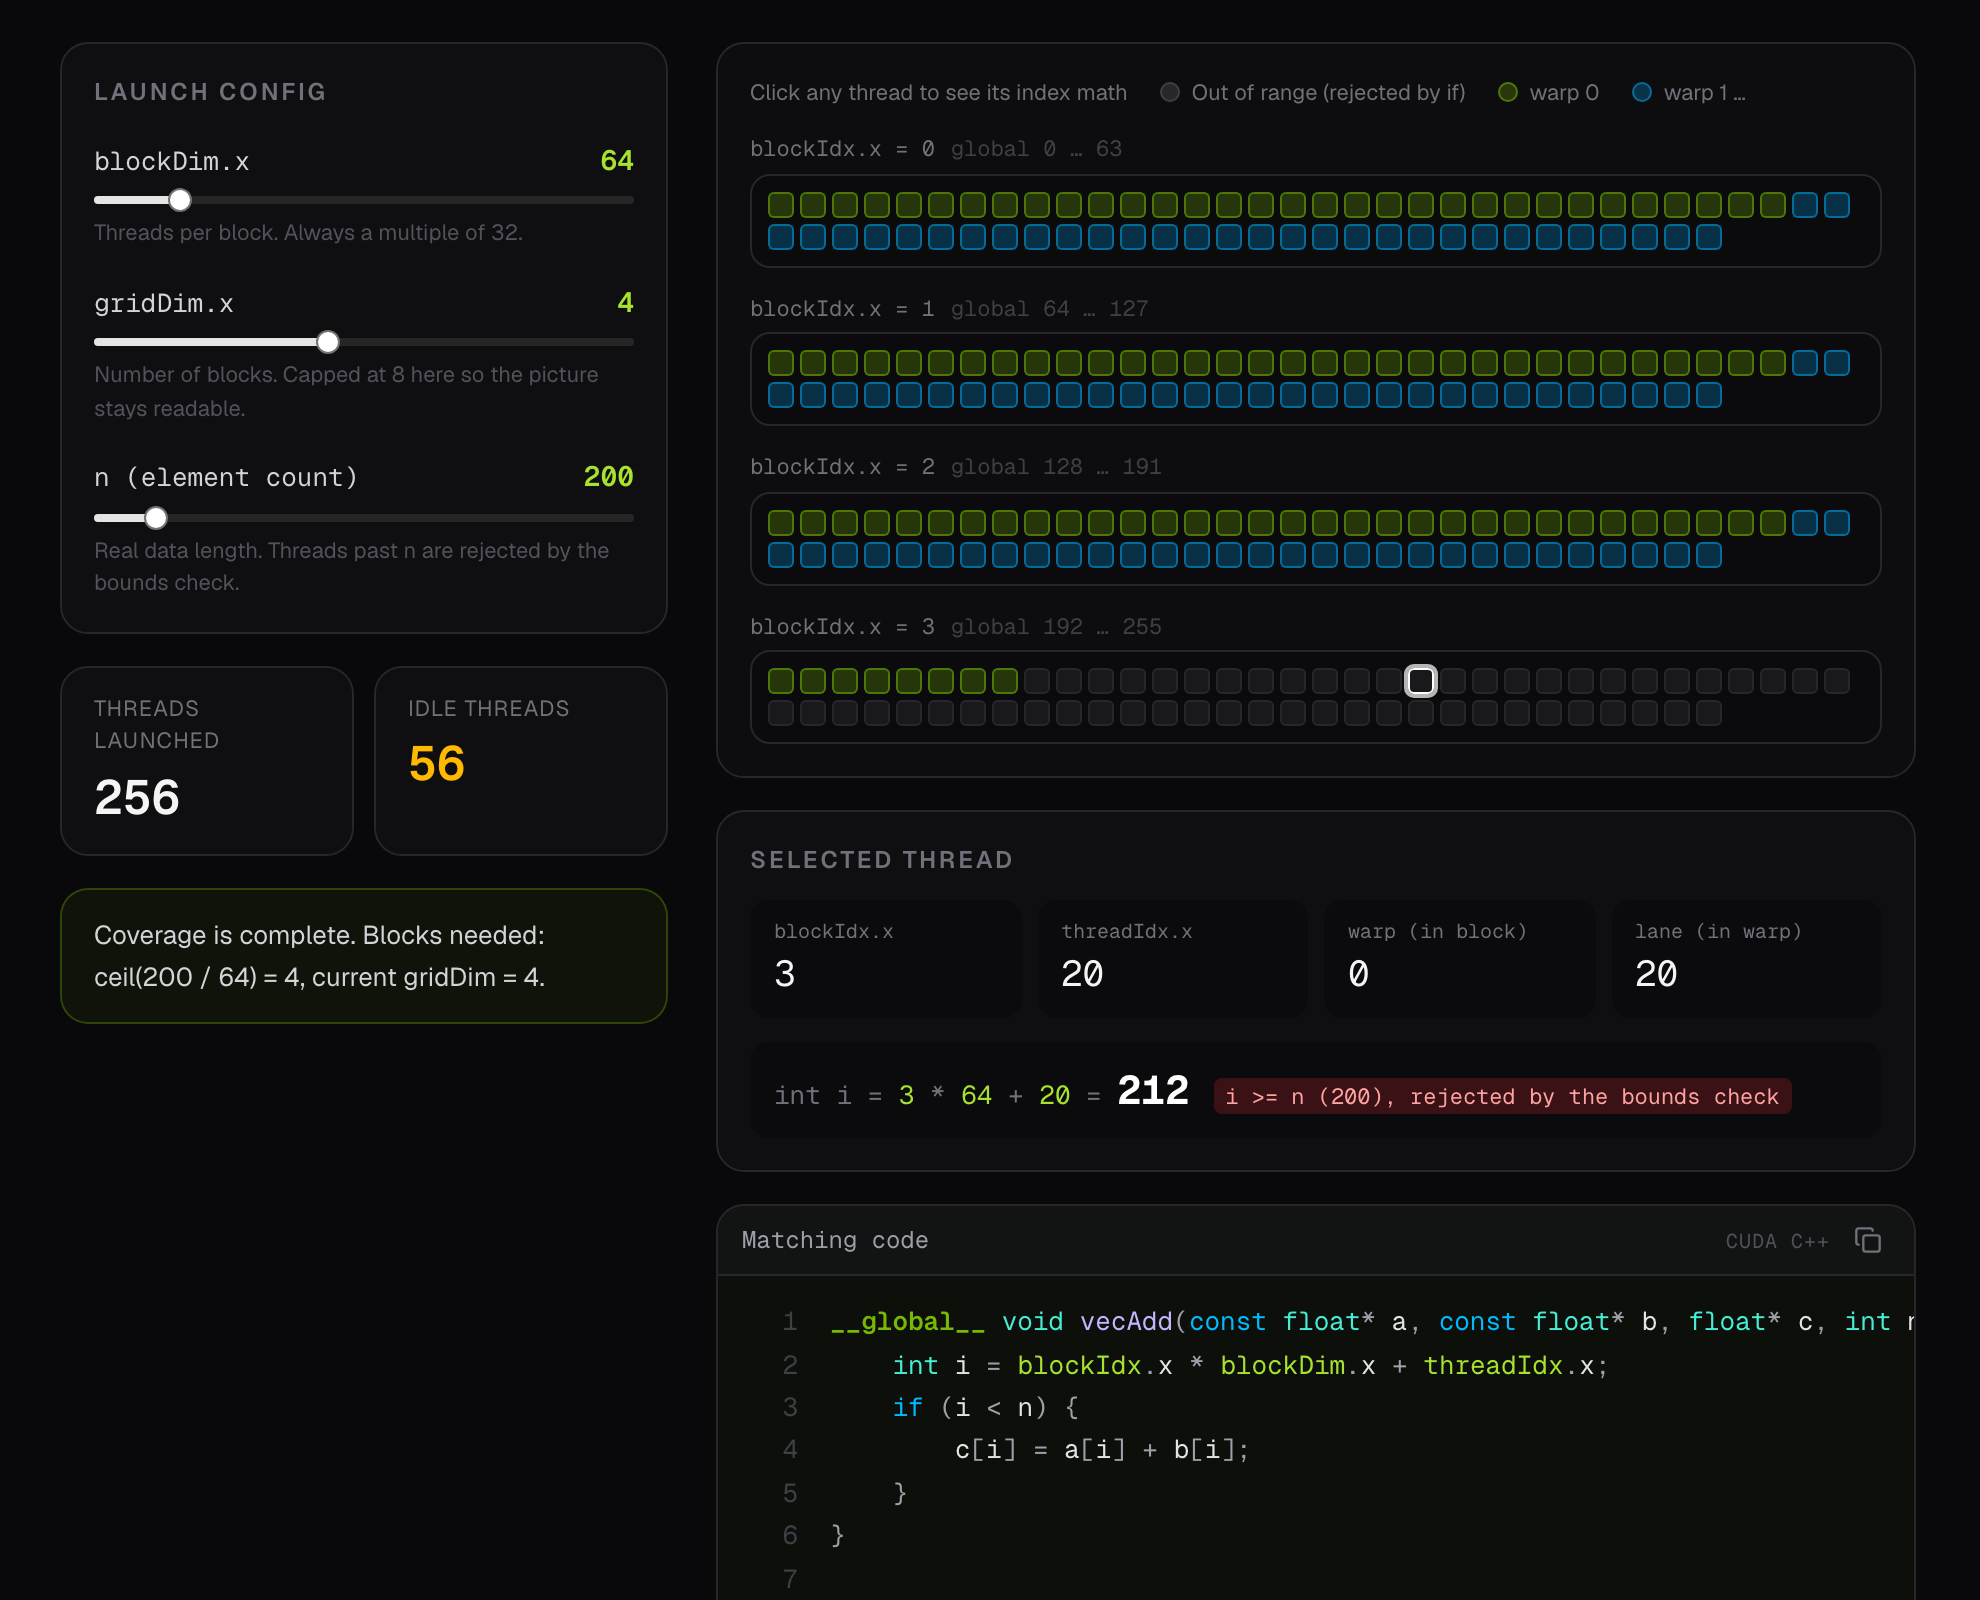
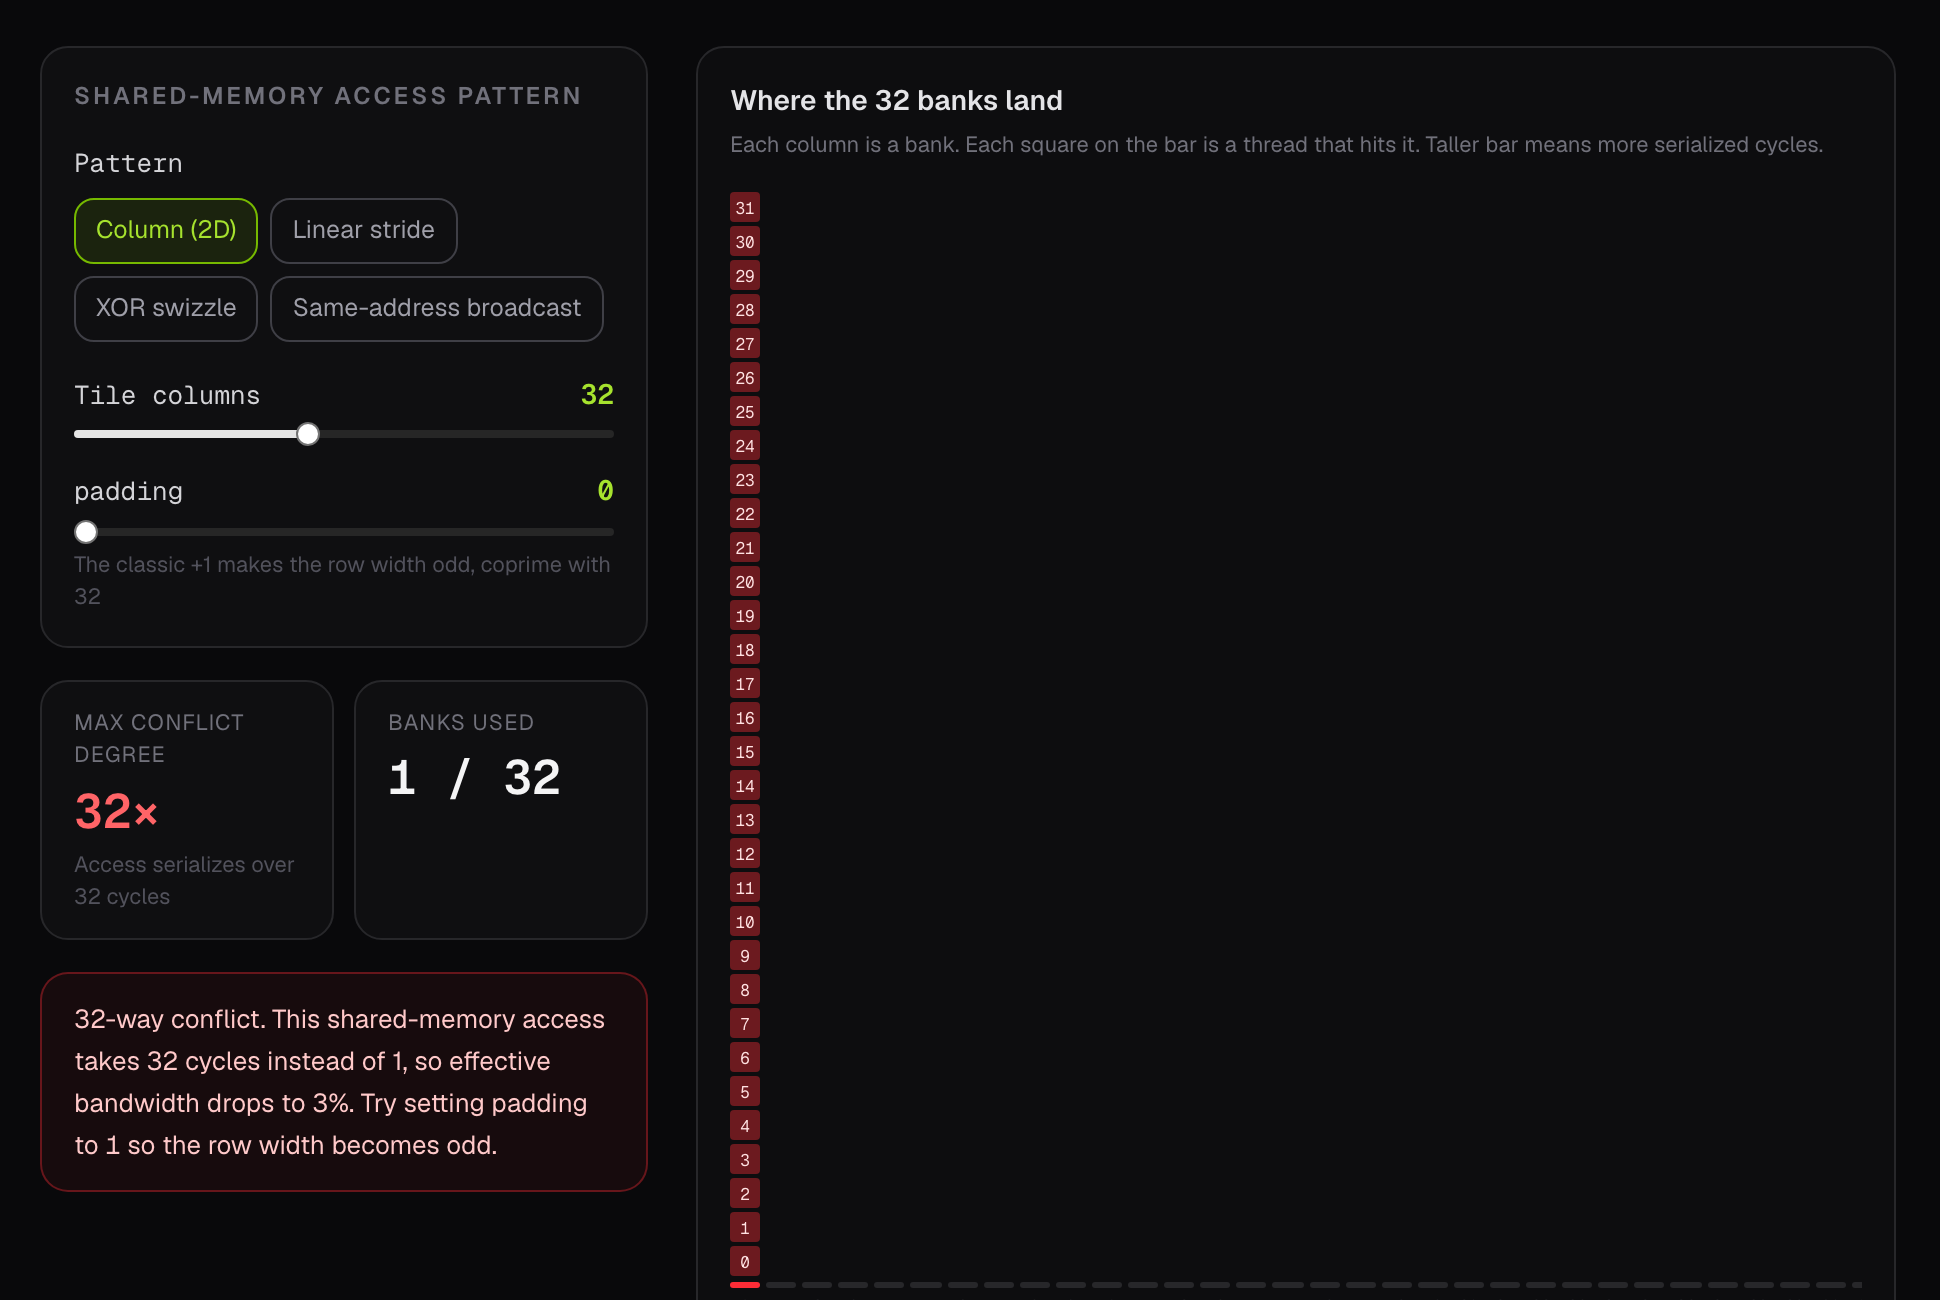
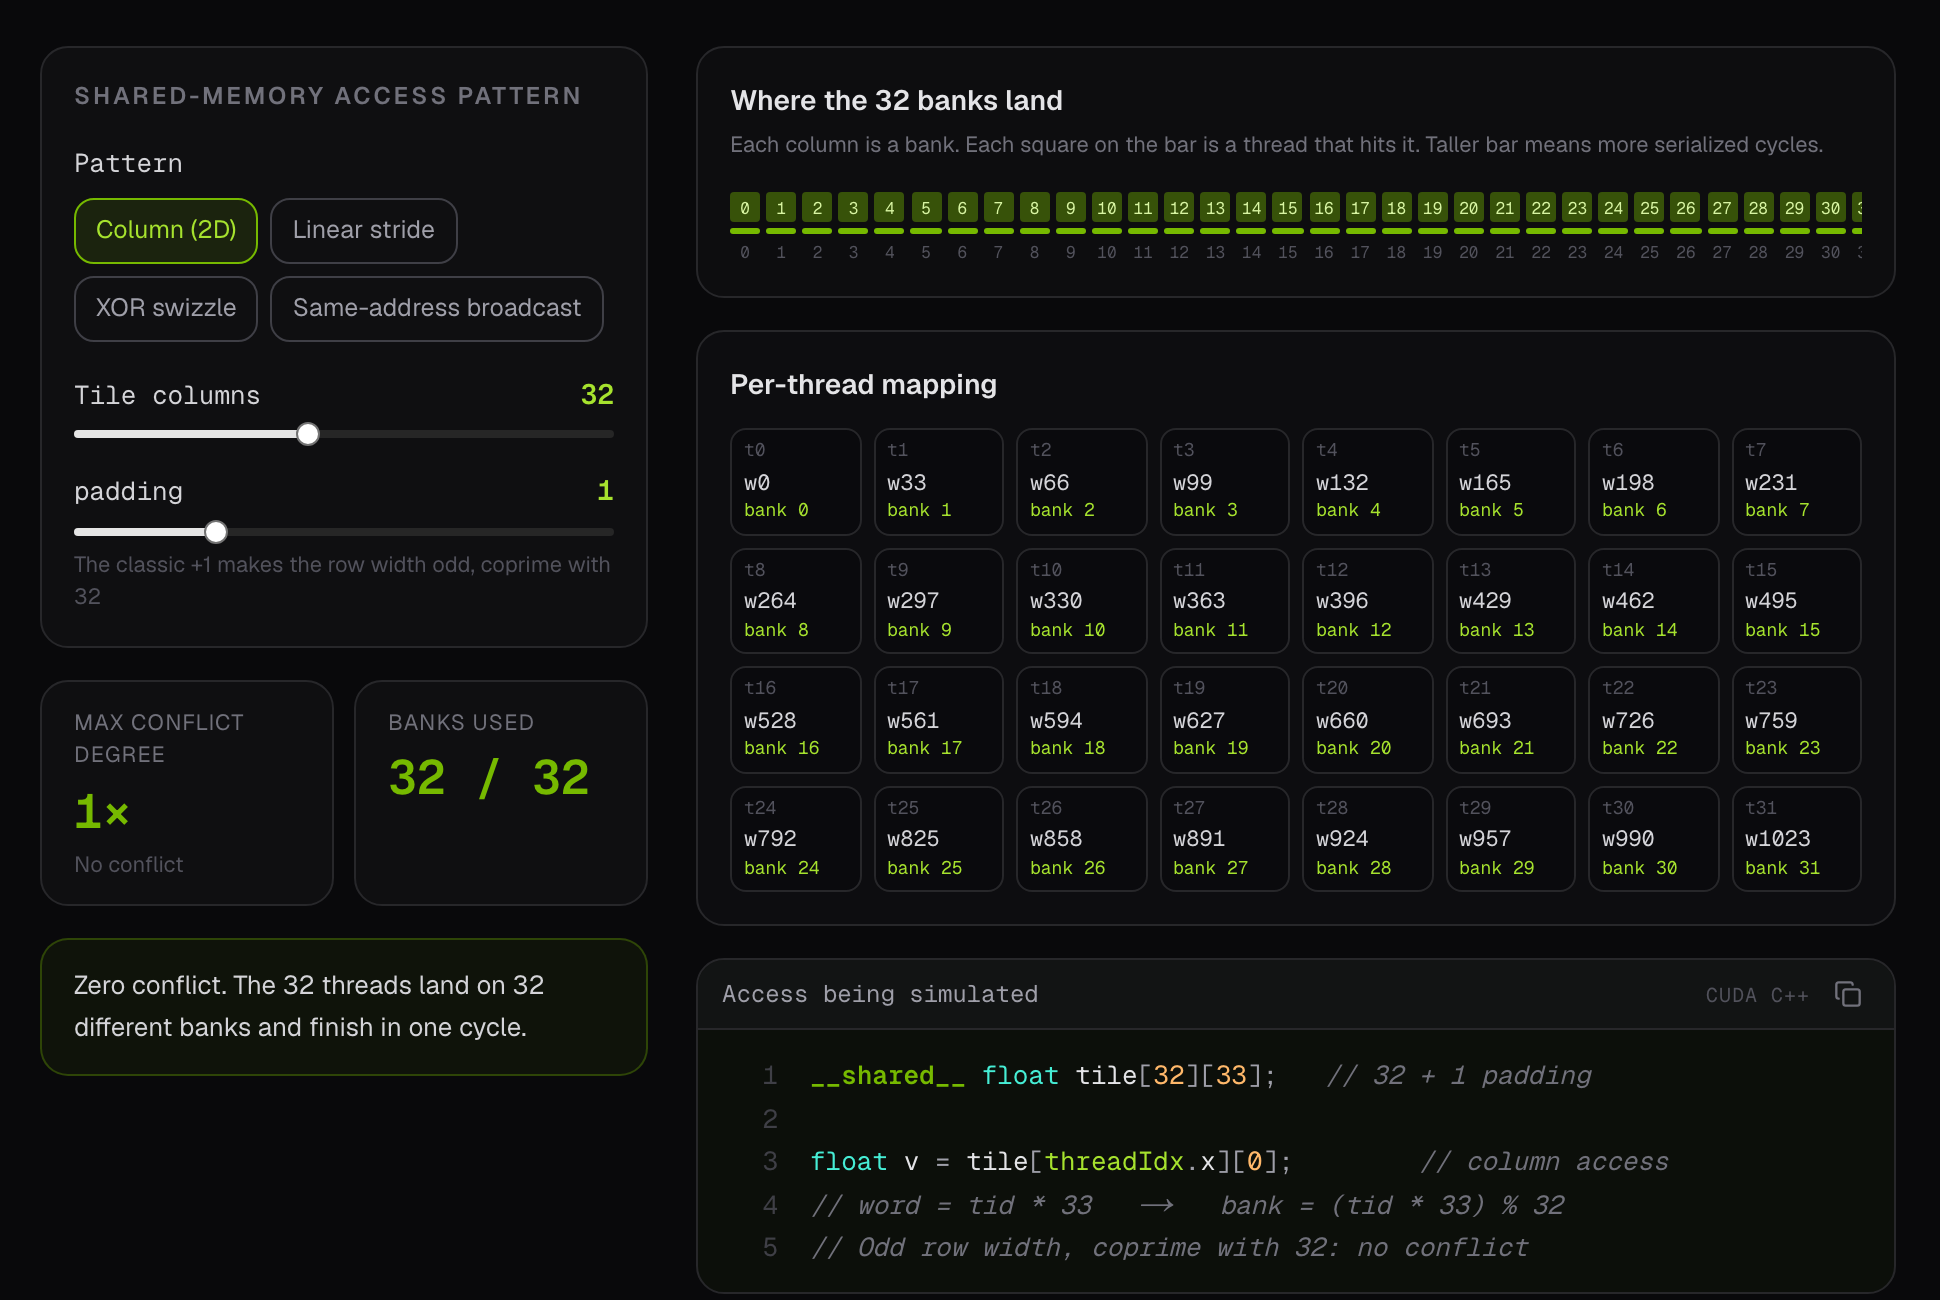
i = 212, which is past n = 200, so the bounds check rejects it.The bank conflict simulator shows the classic [32][32] versus [32][33] case. Reading a 32 by 32 tile down a column puts all 32 threads of a warp on the same bank. One column of padding changes the row width to 33 and spreads them across all 32 banks:
The memory coalescing simulator counts the 32-byte sectors one warp touches as you change the stride, the start offset and the access width; at stride 8 it reports 12.5% bandwidth efficiency. The occupancy calculator covers six architectures, from SM 70 to SM 90, and says whether registers, shared memory or the thread and block limit caps the number of resident blocks.
Occupancy as a ceiling
Its allocation rules follow NVIDIA’s Occupancy Calculator: registers are allocated per warp and shared memory in allocation units, which is why the chart of occupancy against block size has a sawtooth. Clicking a bar sets that block size. The Used N registers line that nvcc prints is the number to type in.
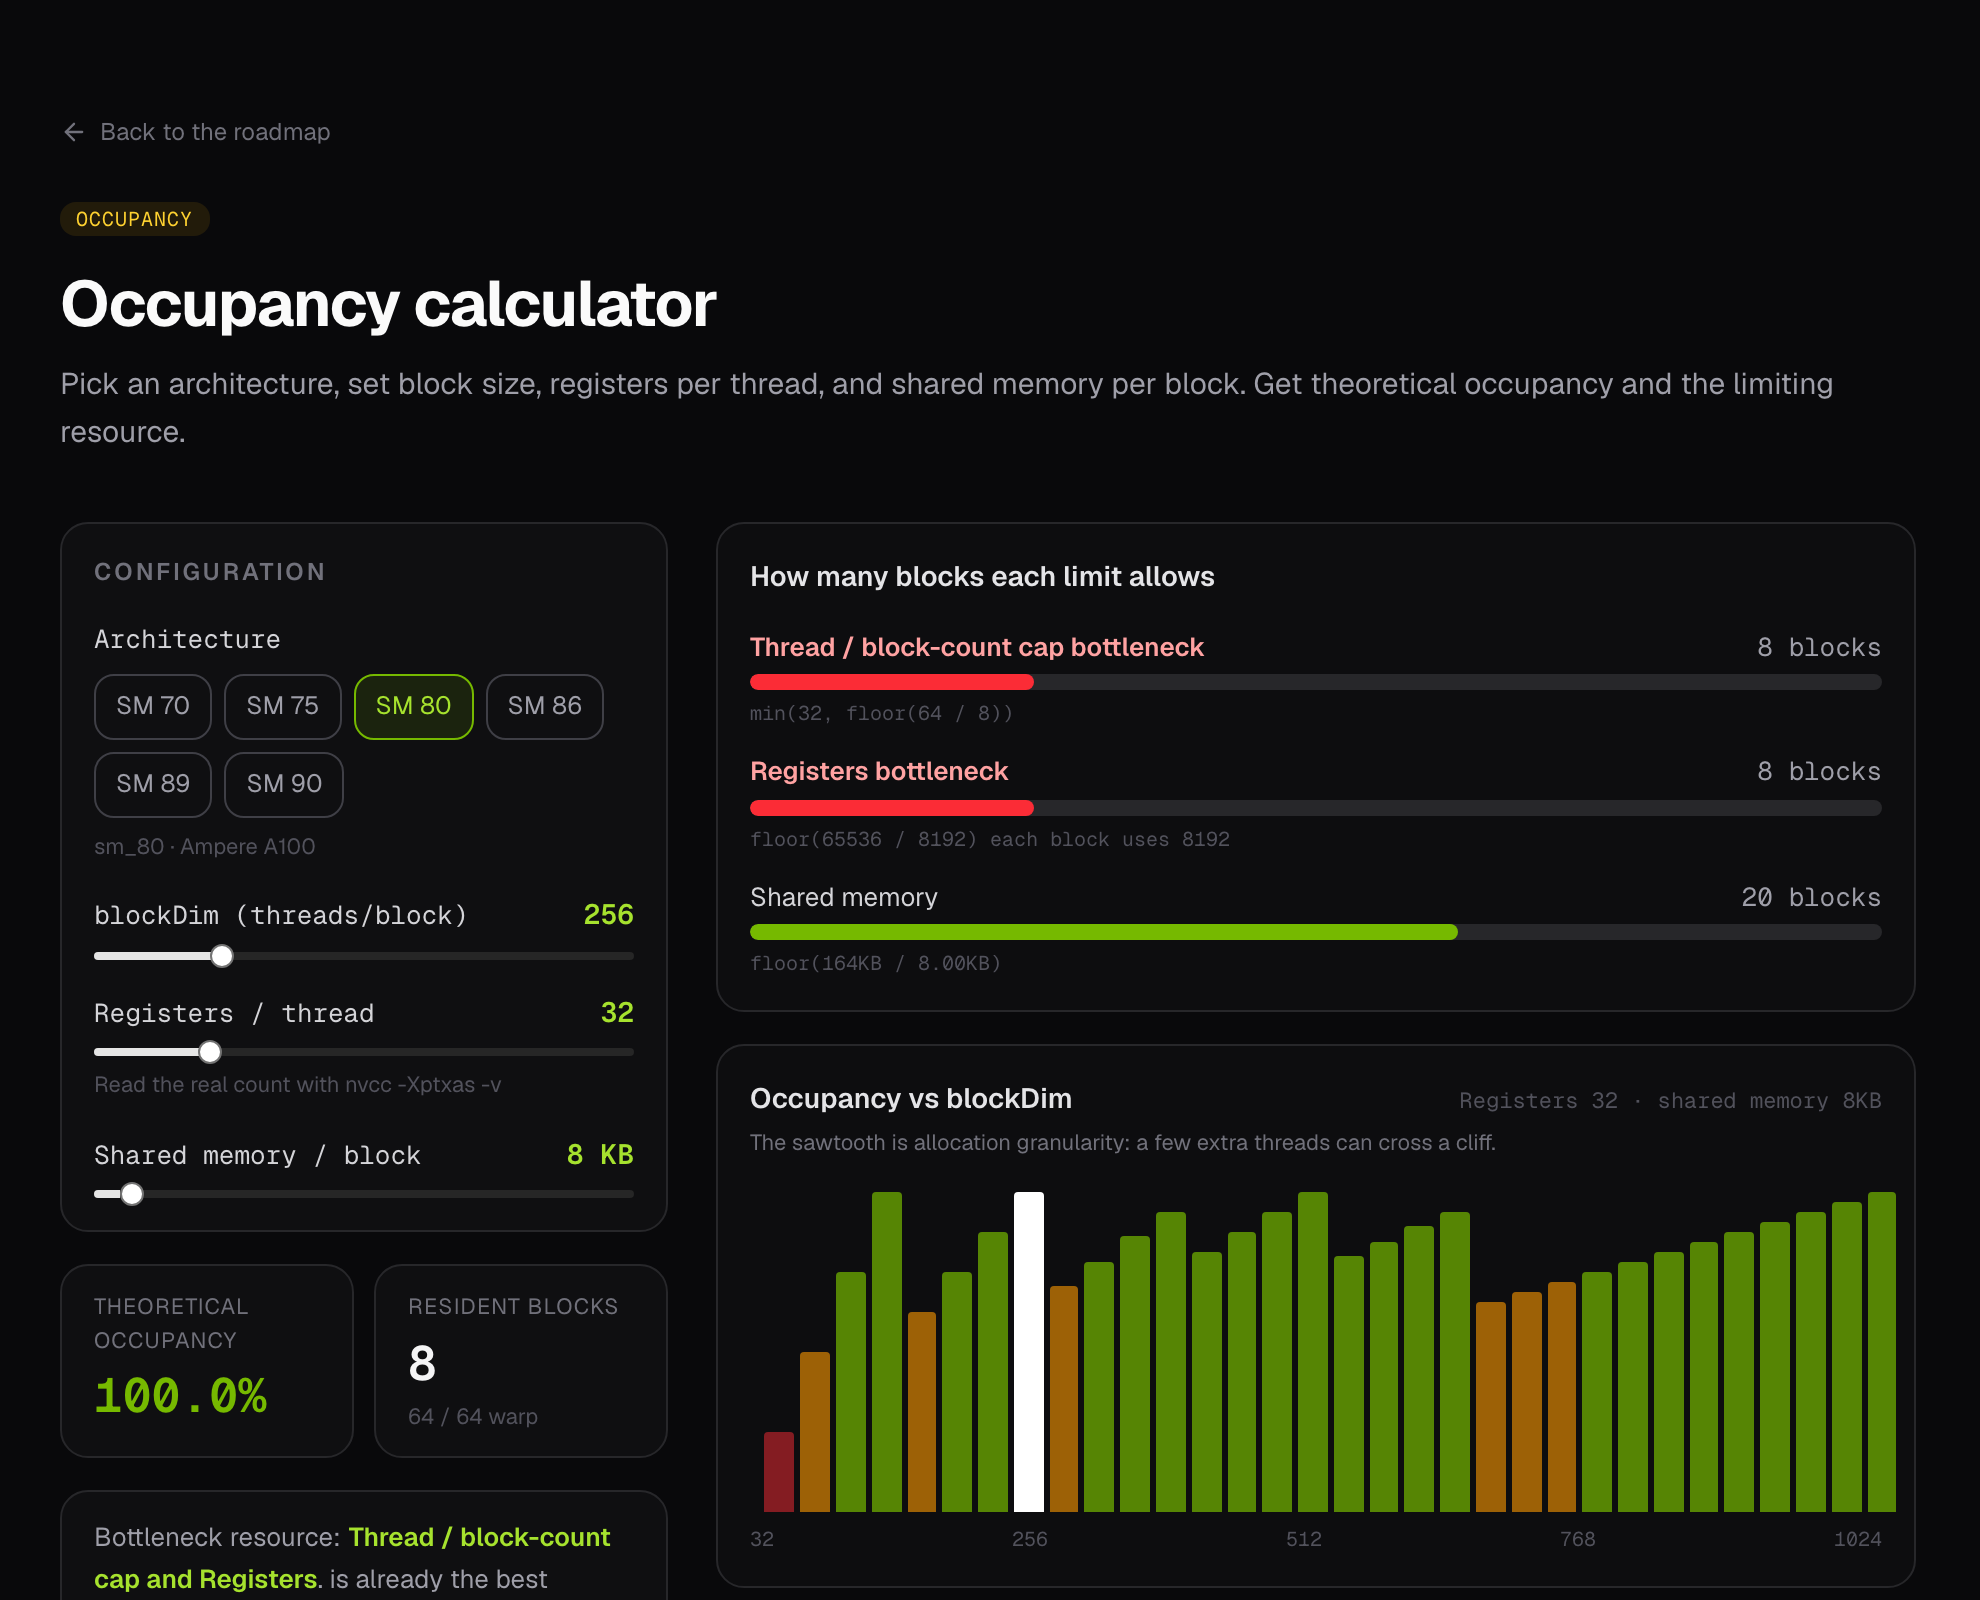
Some of these numbers are under test. The course’s browser test asserts that padding the tile from [32][32] to [32][33] takes the conflict from 32-way to none, and that the strided coalescing preset drops below 20% efficiency while the sequential one stays at 100%. For a claim like “you can finish without a GPU”, a model that could drift silently would be worth little.
Without a GPU, and with one
The cuda/ directory holds nine complete programs: hello, vector add, unified memory, naive and tiled matmul, seven reduction versions, transpose, streams with CUDA Graph, and warp shuffle with privatized histograms. Each has timing and a result check, and several compare versions of the same kernel.
$ cd cuda
$ make            # detect the compute capability and build everything
$ make run        # run the samples in order
$ make sass       # disassemble; search for LDL and STL to find register spills
$ make check      # compute-sanitizer memcheck
$ make verify     # replay the index logic on the CPU: no GPU, no nvcc
make verify is the bridge for readers without a card. It builds an ordinary C++ program that replays the tiled matmul, the register-blocked matmul and two reduction kernels thread by thread, with __syncthreads() as phase boundaries and warp shuffles simulated, and compares each against a serial reference. It tests a matrix size that divides the tile, 128, and one that does not, 200, because the remainder is where index bugs live. On a Mac with no CUDA toolkit it built with the system compiler and passed every case. It cannot find races or performance problems; it finds the index and bounds bugs that cause most early failures.
When you want real hardware, a free T4 on Google Colab runs every sample: paste the file and run !nvcc -O3 -arch=sm_75 -o prog prog.cu && ./prog.
How it is built
The site is a Next.js 16 static export on GitHub Pages, written in TypeScript with Tailwind CSS v4 and shadcn/ui. Lessons are data, not pages. Each is a typed object with a stage, a reading time, its goals, its source file, three quiz questions and a list of blocks, and the English and Chinese editions live side by side in src/content/en and src/content/zh:
export type Block =
  | { kind: "h"; text: string }
  | { kind: "p"; text: string }
  | { kind: "code"; lang?: Lang; title?: string; code: string; highlight?: number[] }
  | { kind: "note"; tone: "tip" | "warn" | "key"; title?: string; text: string }
  | { kind: "list"; ordered?: boolean; items: string[] }
  | { kind: "table"; head: string[]; rows: string[][] }
  | { kind: "ascii"; text: string; caption?: string }
  | { kind: "lab"; href: string; label: string; text: string };
Tested in a real browser
npm run qa drives the built site with Playwright: the quiz accordion, “Mark as done” and the progress ring, the lesson contents, every lab and its keyboard controls, the copy button, the phone menu, the Chinese home page, horizontal overflow on desktop and on a 390-pixel phone, and the browser console, which must stay free of errors.
Hardware numbers, such as latency orders of magnitude, bandwidth and the per-architecture SM limits, come from the compute capability appendix of the CUDA C++ Programming Guide.
Where to go next
You can finish a CUDA course without a GPU, if the course is designed for it is the design note: what “no GPU” covers, what each lab cuts, and the moment you need a real card and Nsight. It also has two of the labs rebuilt as figures you can try on the page.
Kernels from zero picks up where the course stops. It takes one kernel, a matrix transpose, and rewrites it one idea at a time, each version checked against the same reference and reported as effective bandwidth: a kernel that is correct, then coalescing, then shared memory and the bank conflict. Occupancy and measuring with Nsight Compute are next.
Limits
The labs count; they do not measure. They show transactions, banks and resource limits in a model, and they leave out caches, DRAM timing, achieved occupancy and everything a profiler would tell you. The course says where that line is, and the last stage sends you to Nsight on real hardware.
The site has a dark theme only. The lessons are in English and Chinese, but the comments in the cuda/ samples and the output they print are still in Chinese. According to the samples’ README, they were compiled with nvcc 12.0 for sm_70 and sm_80 without register spills; other toolkits and architectures are untested.
Getting started
- Start with lesson one. Open the first kernel, or the Chinese edition. The syllabus on the left keeps your place.
- Try a lab before lesson two. The thread index visualizer is the one lesson two leans on.
- Run the samples when you can. On a machine with a GPU,
cd cuda && make && make run. Without one,make verifyafter you edit a kernel, or Colab’s free T4. - Run the site locally if you want to change it.
npm installandnpm run devserve it athttp://localhost:43117.
- Live: lr00rl.github.io/cuda-cpp-course (Chinese: /zh/)
- Source: github.com/lr00rl/cuda-cpp-course